OPC Xml/DA Client implements communication with local and remote OPC servers. The communications blocks are dynamically created according to the pooling cycle defined on the Access Type for each Device Point.
Communication Driver Name: OPC XML/DA Client
Implementation DLL: T.ProtocolDriver.OPCXmlDA.dll
Protocol: OPC proprietary
Interface: OPC proprietary
OPC servers supported: Any OPC server compatible with OPC Xml/DA v2.05 or v3.0 specifications
Protocol Options: None
Max number of nodes: User defined
PC Hardware requirements: None
PC Software requirements: OPC Core components
Channel Configuration
There is no channel configuration for OPC Xml/DA Client channels.
Node Configuration
Station Configuration
Service URL: Defines the location of the OPC Server. Example: OPCDAServer.2, \\192.168.1.201\ OPCDAServer.2, http://192.168.1.2:4200
Refresh Rate: Server update rate
AllItemsSameGroup: A Flag indicating if the driver should add all items at the same OPC group. Only one connection is created with OPC Server
EnableReadPolling: A Flag indicating if reading is by polling
ReadFromDevice: Forces all reads made from a device
UseTimestampFromComputer: Uses timestamp from a computer instead of a device
Point Configuration
Choose the OPCServer item that will communicate with the tag.
You can type the OPC Server item's name into the textbox, or you can use the cell editor to browse the OPC Server items.
OPC Arrays: You should configure the Array field in the Modifiers column.
Troubleshoot
The status of the driver's execution can be observed through the diagnostic tools, which are:
• Trace window
• Property Watch
• Module Information
The above tools indicate if the operations have succeeded or have failed. A status of 0 (zero) means communication is successful. Negative values indicate internal driver errors, and positive values indicate protocol error codes.
Consult your OPC Server documentation for the specific protocol error codes.
What is DCOM
Distributed Component Object Model (DCOM) is an extension of Component Object Model (COM) that allows COM components to communicate among objects on different computers. DCOM uses Remote Procedure Call (RPC) to generate standard packets that can be shared across a network, which in turn allows COM to communicate beyond the boundaries of the local machine.
Because DCOM poses a security threat, care should be taken to not expose more than what is required for the application. Although multiple security layers exist, it is still possible that some part of the system will be compromised.
Users and Groups
To ensure that an OPC connection is secure, it is suggested to create users and groups that are exclusively for this use. These can be manually added by any user who has the proper credentials to do so.
Adding a Local User
- Launch the Local User and Groups snap-in, which is part of the Microsoft Management Console. It can be viewed directly by selecting WindowsKey + R and typing ‘lusrmgr.msc’.
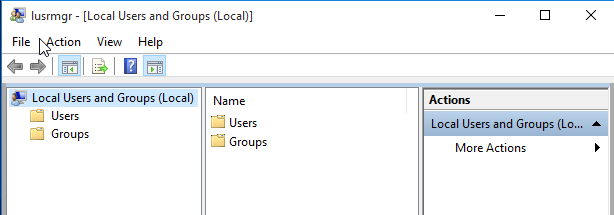
- Next, click Users. Then, select Action > New User.
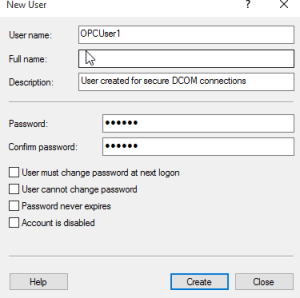
- Type the appropriate information in the dialog box.
- Change the following options as required:
- User must change password at next logon
- User cannot change password
- Password never expires
- Account is disabled
- Click, Create. Then, click Close.
Adding a Local Group
- Launch the Local User and Groups snap-in, which is part of the Microsoft Management Console. It can be viewed directly by selecting WindowsKey + R and typing ‘lusrmgr.msc’.
- Click, Groups. Then, select Action > NewGroup.
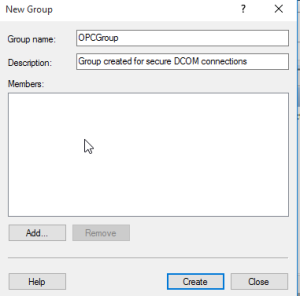
- In Group Name, type a name for the new group.
- In Description, type a description of the new group.
- Click, Create. Then, Close.
Adding Users to a Group
- Launch the Local User and Groups snap-in.
- Select Groups.
- Right-click on the group in which a member will be added, and select All Tasks.
- Click, Add to Group > Add.
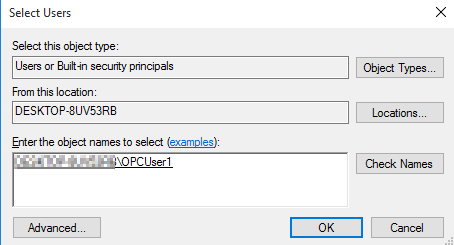
- In Object Types, select the types of objects it will find.
- In Locations, click the domain or the computer that contains the users it will add. Click, OK.
- Type the name of the user or group that will be added to the group. Click, OK.
- To validate the user or group names being added, click Check Names.
DCOM Configuration
The computer running the OPC server must make changes to the application and system levels to correctly setup DCOM.
Configuring the Application
- Launch the Component Services snap-in, which is part of the Microsoft Management Console. It can be viewed directly by selecting Windows Key + R and typing ‘dcomcnfg’.
- Under Console Root, go to Component Servers > Computers > My Computer > DCOM Config.
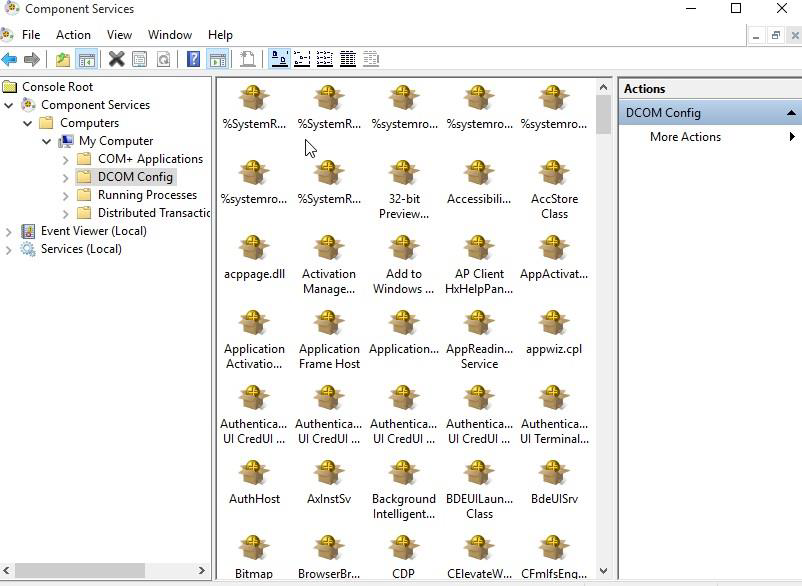
- Browse the DCOM enabled objects until the OPC server application is located. In this example, ‘Tatsoft OPC DA Server’ is displayed where the actual application name will appear.
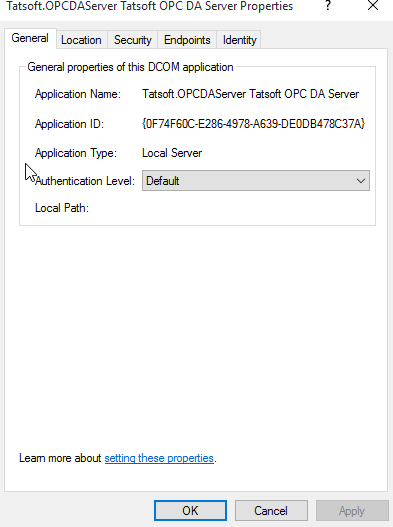
- Right-click on the server application, and select Properties.
- Open the General tab, and verify that the Authentication Level is set to Default.
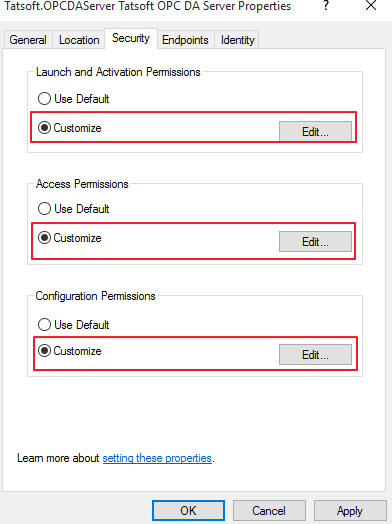
- In Launch and Activation Permissions, select Customize. Here, users and groups can be granted permission to start the OPC server if it is not already running.
- Click Edit.
- In Launch and Activation Permissions, select Add
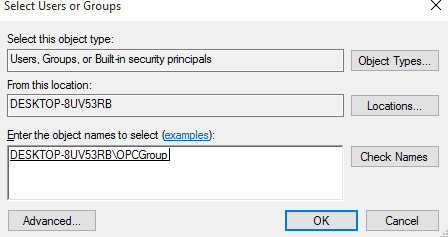
- In Object Types, select the desired object type.
- In Locations, click the domain or the computer that contains the users or groups that will be added.
- Then, click OK.
- Type the name of the user or group in the window. To validate the user or group names being added, click Check Names.
- After the account has been validated, click OK.
- Continue to add users and groups until all the desired accounts have been added. The new account or group should be visible in the Group or user names list.
- Next, select the new user or group.
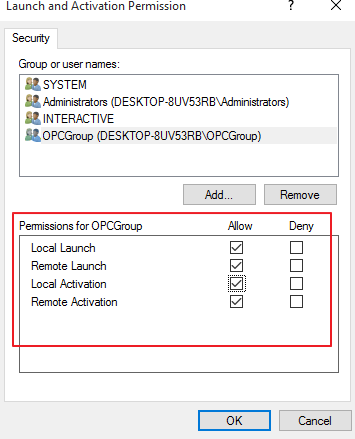
- Repeat the process for all accounts that have been added. Click OK.
- Select Customize in the Access Permissions group. Here, users and groups can be granted permissions to make calls to the OPC server. These calls include browsing for items, adding groups and items, or any other standard OPC call.
- Click Edit.
- Repeat the same procedure for the Access Permissions option.
- Browse to the Identity tab and select The interactive user option.
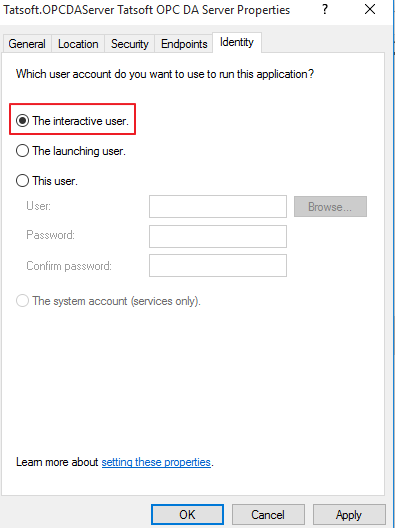
- Select OK to close the Server Properties.
Configuring the System
Under Component Services snap-in, go to Console Root > Component Services > Computers.
Right-click on My Computer and select Properties.
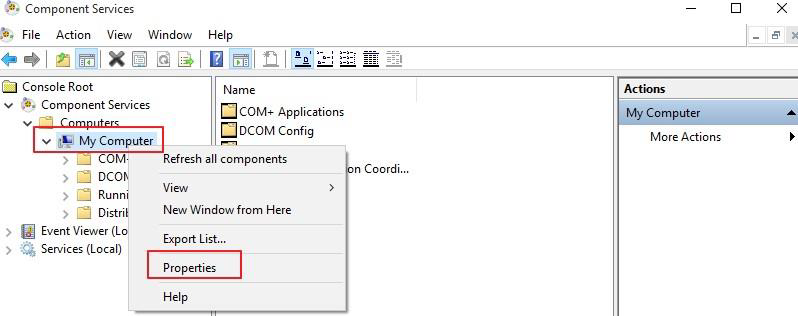
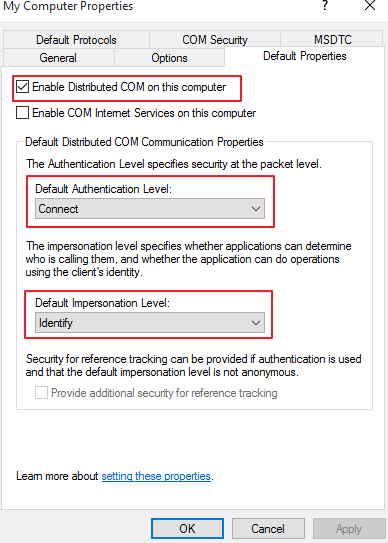
- Select the Default Properties tab, and verify that the Enable Distributed COM on this computer option is enabled.
- Select Connect for the Default Authentication Level.
- Select Identify for the Default Impersonation Level.
- Select the COM Security tab.
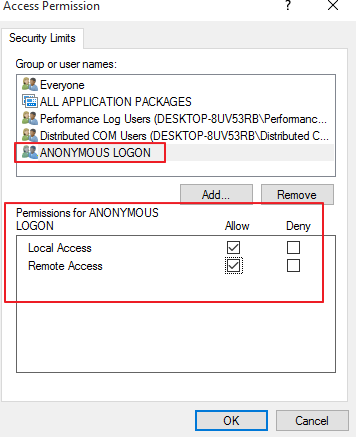
- Select Edit Limits in the Access Permissions group.
- Select the ANONYMOUS LOGON group account in the Group or user names list.
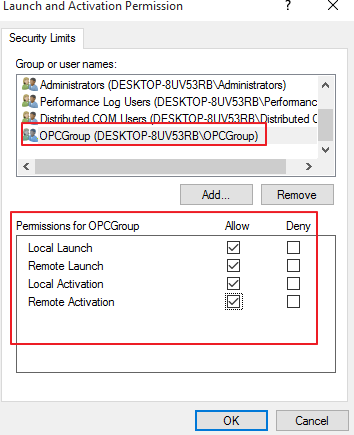
- In the Launch and Activation Permissions group, select Edit Limits.
- Add the created OPC Group to the Groups list.
- Next, select the new user or group, and allow the permissions.
Firewall Configuration
In some cases, it is easier to turn off any firewalls that may be running on both the client and server machine before DCOM is setup. Once a connection has been successfully created, it is recommended that the firewall security is restored and the correct exceptions are added.
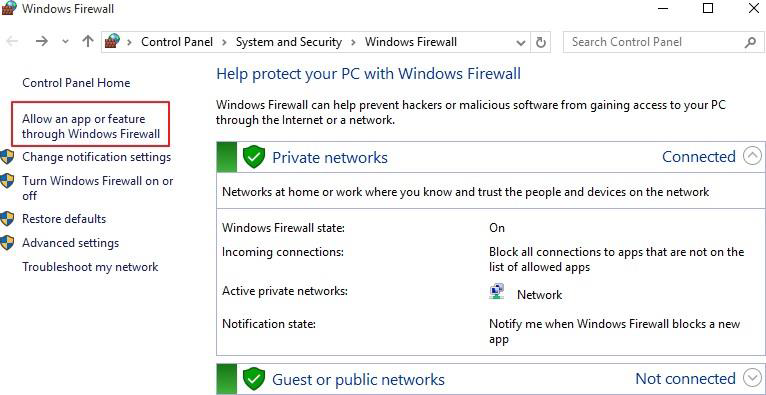
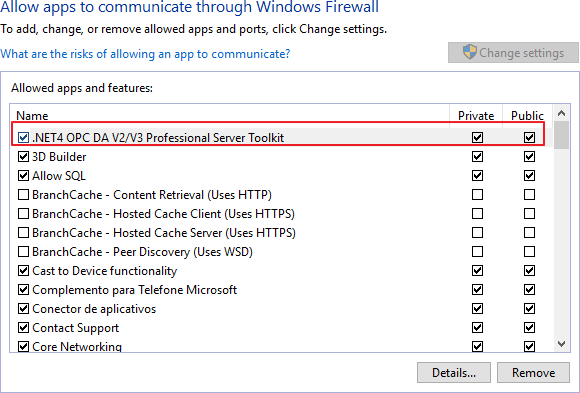
- Launch the Windows Firewall by selecting Windows Key + R and then typing ‘firewall.cpl’.
- Browse to ‘Allow an app or feature through Windows Firewall’.
- Click on Allow another app, and browse for the file named DANSrvNet4.exe that is usually located at: C:\ProgramFiles(x86)\< CompanyName>\<ProductName>\<ProductVersion>
The steps below must be executed on both the Client and Server.
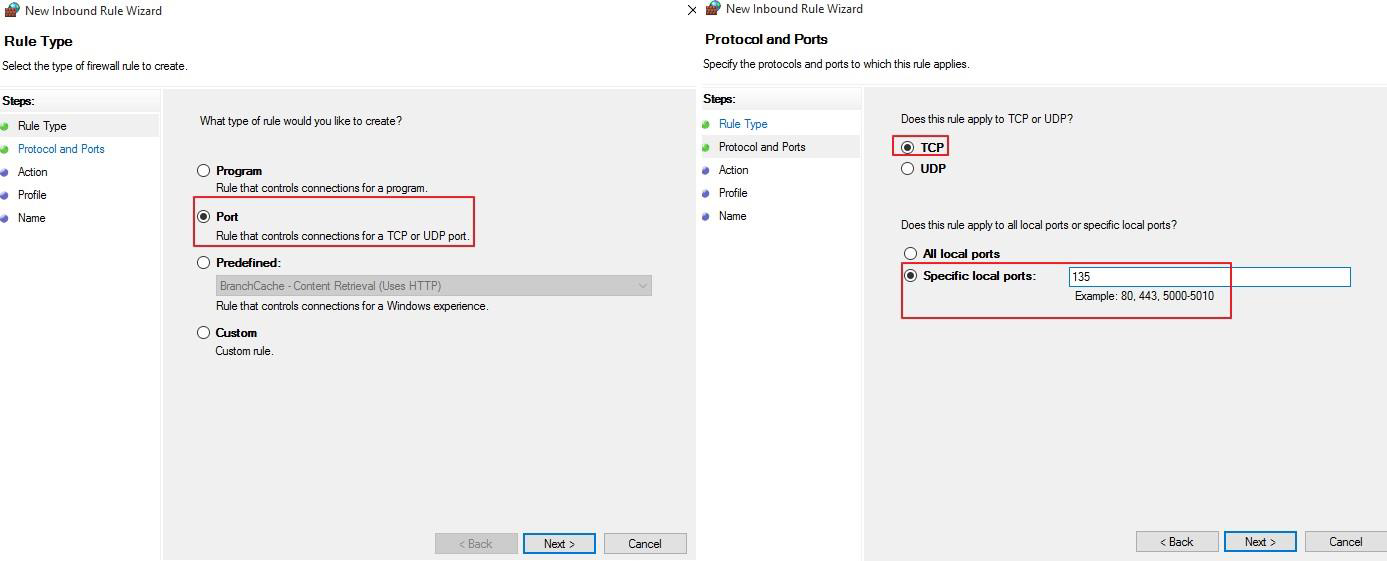
- Click on Advanced Settings, right-click on Inbound Rules, and select add new rule.
- Select Port and click on Next.
- Apply the rule for TCP connections, and enter the port number, 135.
- Select Allow the connection, and click on next.
- Choose the domains that best suit your case.
- Enter a friendly name and description for the new rule.
- Repeat the procedure for Outbound Rules tab.
